Choosing an LED Wall Display Panel is more than comparing screen sizes and prices. It requires careful attention to viewing distance, brightness, resolution, installation conditions, and long-term maintenance. A panel that looks impressive in a showroom may appear excessive in a small meeting room. Outdoor displays face sunlight, rain, dust, and changing temperatures. Indoor systems usually require different protection levels and brightness settings.
This guide presents ten practical tips based on common installation experience and professional display evaluation. Pixel pitch matters because it affects image sharpness at different distances. A fine-pitch panel may suit close viewing, while a wider pitch can reduce costs for large venues. Refresh rate, color consistency, cabinet design, power consumption, and front-service access also deserve close inspection. Small details matter.
Reliable suppliers should provide clear technical specifications, testing records, warranty terms, and responsive support. Ask how replacement modules are stored and how quickly repairs can be completed. A strong warranty helps, but it cannot replace sound engineering. Check the control system, content sources, mounting structure, and electrical requirements before approving the purchase. Local safety standards must guide every installation decision.
No checklist is perfect. Real projects often reveal overlooked issues, such as glare from glass walls or limited maintenance space behind the display. Reviewing these risks early can prevent expensive changes later. The right Led Wall Display Panel should match the environment, audience, content, budget, and future operating plans. Careful comparison creates a safer, clearer, and more dependable visual experience.
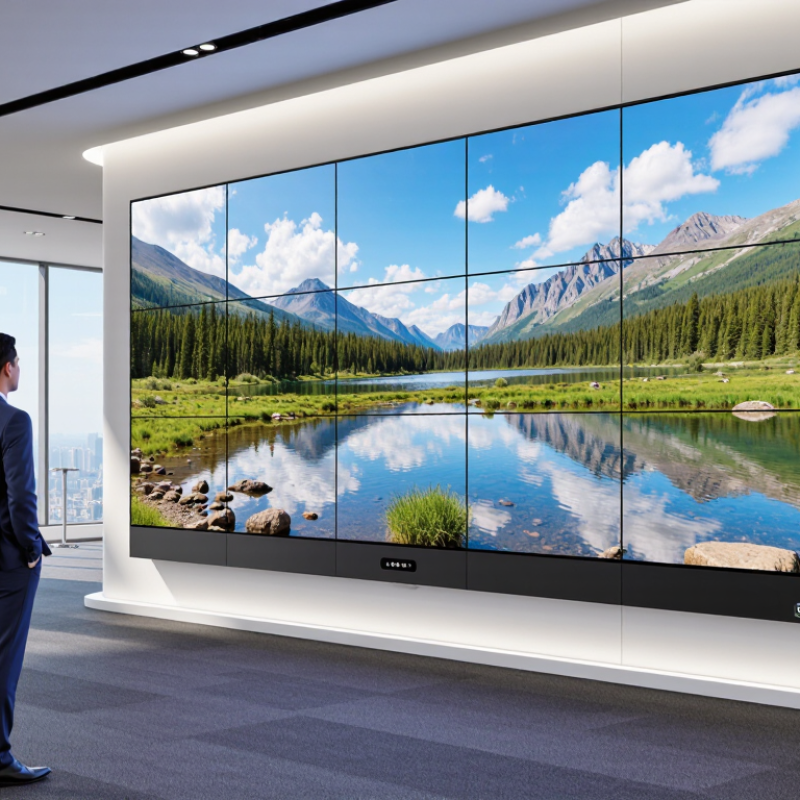
Before choosing an LED wall display panel, define what the screen must achieve. A retail window needs bright promotional visuals, while a conference room needs comfortable text readability. The purpose changes the required brightness, pixel pitch, refresh rate, and viewing distance.
Measure the environment carefully. Note the nearest and farthest viewer positions. Check sunlight, ceiling lights, wall color, and available installation space. Outdoor displays usually need stronger weather protection and higher brightness. Indoor screens may need softer light to prevent eye strain. A finer pixel pitch helps viewers sitting close, but it can increase the project cost.
I once evaluated a display by looking only at its size. That was a mistake. The image appeared sharp from the back, but text looked uneven near the front. Viewing distance matters more than many buyers expect. Content also matters. Detailed maps, small charts, and subtitles require different performance from simple graphics.
Test the panel in its actual setting whenever possible. Bring sample content, including dark scenes and fast motion. Watch for flicker, color shifts, and distracting reflections. Ask how easily technicians can access modules and cables. Easy maintenance saves time later, although I have seen teams underestimate this point. Leave space for ventilation and future repairs. A beautiful wall can still become a difficult tool when its purpose and viewing environment are treated as afterthoughts.
Pixel pitch controls image sharpness, viewing distance, and budget. It measures the space between neighboring LED pixels. Smaller pitch usually produces finer detail, but it increases cost and processing demands. A practical viewing estimate is three to four meters for every one millimeter of pitch. Thus, a 2.5 mm panel may suit viewers standing about 7.5 to 10 meters away. Distance matters. Do not guess.
The International Committee for Display Metrology references visual acuity near one arcminute when evaluating perceived detail. Use that principle, but test the actual room. I have seen a 1.5 mm wall look wasteful in a lobby because visitors stood far away. For meeting rooms, presentations, and close camera shots, pitches between 1.2 and 2.5 mm often provide cleaner text. Larger venues may perform well with 2.5 to 4.8 mm. Content matters more than specifications alone.
Calculate native resolution from the physical wall size and pitch. A 4-meter-wide wall using a 2 mm pitch contains roughly 2,000 horizontal pixels. That supports detailed graphics, though the playback source must match. AVIXA’s 2024 Industry Outlook and Trends Analysis values the professional audiovisual market at approximately 332 billion dollars in 2024, showing how widely these systems are being deployed. Yet market growth does not guarantee a correct installation. Check viewing distance, camera testing, brightness, and aspect ratio together. I still treat the first calculation as provisional; room lighting can expose an uncomfortable mistake.
Start by measuring the available wall and the audience area. A larger panel is not automatically better. It may overwhelm a narrow lobby or waste power in a small meeting room. Record the wall width, ceiling height, and expected viewing distance. Leave space for ventilation and service access. My first installation ignored rear clearance, creating avoidable maintenance problems.
Compare brightness under real lighting conditions. Indoor displays often need less brightness than outdoor screens. A sunlit entrance may require stronger output and better glare control. Ask for measured brightness data, not vague descriptions. Excessive brightness can cause eye fatigue and reduce image comfort. Test white text, skin tones, and dark scenes before deciding. Short demonstrations can mislead.
Viewing distance should guide pixel pitch and panel size together. Close viewers can notice pixel gaps on a coarse display. Distant viewers may not benefit from an expensive fine-pitch panel. Use a sample panel at the intended distance, then walk around the room. Check readability from the sides, not only from the center. I once trusted a showroom image and regretted it. Room lighting was different. Also compare refresh rate, color consistency, power consumption, and front or rear maintenance access. A simple measurement sheet can expose trade-offs that persuasive sales language often hides.
A dependable LED wall begins with solid construction. Inspect the cabinet edges, module connections, locking system, and protective coating. Panels should feel rigid, not flimsy. Look for even seams and secure power sockets. Strong cabinets reduce movement during transport and installation. Ask for documented brightness, pixel consistency, refresh performance, and operating temperature data. Thermal design matters, especially in crowded indoor spaces or warm outdoor locations. A panel that cannot release heat may suffer earlier failures.
Installation quality deserves equal attention. Verify the wall structure, load capacity, ventilation, and cable routes before delivery. Measure the mounting surface twice. Small alignment errors become obvious across a large screen. Leave service access behind or in front of the panels, depending on the design.
I once underestimated the space needed for a power supply replacement. That mistake made routine maintenance slower and more expensive. Plan for it.
Maintenance should be practical, not theoretical. Keep spare modules, power units, receiving cards, and correct tools nearby. Record brightness settings, fault locations, cleaning dates, and software changes. Clean ventilation openings carefully, because dust blocks airflow. Check connectors after vibration, relocation, or temperature changes. Replace damaged parts with matched specifications. Review calibration after repairs, since one bright module can disturb an entire image. Small oversights become costly. Reliable suppliers should provide clear manuals, test reports, training, and reachable technical support.
10 Tips for Choosing an LED Wall Display Panel
Tip 1: Check every input and output before installation. Confirm support for HDMI, DisplayPort, control software, and your existing media system. Tip 2: Test signal stability with a laptop, camera, and backup source. A beautiful panel is useless when the image drops. Tip 3: Ask whether the system supports redundant power and signal paths. Tip 4: Inspect cable access behind the wall. Tight spaces create avoidable service problems.
Tip 5: Compare energy use at normal brightness, not only maximum output. Indoor panels often run for many hours, so small differences become expensive. Tip 6: Request power data in watts per square metre. Then estimate monthly consumption using your actual operating schedule. Tip 7: Check brightness controls and automatic scheduling. Lower brightness can reduce glare and electricity use. Cooling matters too. Dusty vents may increase operating costs. I have seen energy estimates fail because installers ignored ventilation and standby consumption.
Tip 8: Read the warranty carefully. Check coverage for pixels, modules, power supplies, labour, and shipping. Tip 9: Ask how quickly replacement parts can arrive. A long warranty means little if repairs stop your event or showroom. Tip 10: Calculate total cost beyond the purchase price. Include mounting, controllers, cabling, installation, electricity, calibration, cleaning, and future module replacement. Compare written quotes with identical specifications. A spreadsheet helps, but it can still miss staff training and downtime. Be willing to question your assumptions.
Compare connectivity, energy use, warranty coverage, installation requirements, and total cost before selecting an LED wall display. The chart below estimates annual electricity consumption using typical average power values and 12 hours of daily operation.
Energy-use basis: Indoor standard: 200 W/m², outdoor standard: 350 W/m², and high-brightness outdoor: 500 W/m². Annual usage is calculated as average power × 12 hours per day × 365 days.
Pixel pitch measures the space between neighboring pixels. Smaller pitch usually creates sharper images and higher costs. It also demands more processing power.
Estimate three to four meters of viewing distance for every one millimeter of pitch. A 2.5-millimeter pitch may suit viewers seven to ten meters away. Test the actual room, because estimates can fail.
Pitches from 1.2 to 2.5 millimeters often present cleaner text and close camera images. Larger venues may suit 2.5 to 4.8 millimeters. Content still matters more than specifications alone.
Divide the wall width by the pixel pitch. A four-meter wall with a two-millimeter pitch contains about 2,000 horizontal pixels. The playback source should match this resolution.
Check every input and output. Test a laptop, camera, and backup source. Watch for signal drops. A beautiful panel is useless without stable images.
Redundant paths can reduce disruption when one connection fails. Confirm cable access behind the wall. Tight spaces make servicing harder. Small planning mistakes become expensive later.
Request power data in watts per square metre. Use normal brightness, not only maximum output. Multiply consumption by your actual operating hours. Ventilation and standby use also matter.
Check pixels, modules, power supplies, labor, shipping, and replacement timing. Include mounting, controllers, cabling, installation, calibration, cleaning, and electricity. A spreadsheet helps, but it may still miss training and downtime.
Choosing the right Led Wall Display Panel starts with understanding its purpose and viewing environment. Consider whether it will be used for indoor presentations, retail advertising, events, or outdoor communication, as each setting requires different levels of brightness, durability, and weather protection. Pixel pitch and screen resolution should match the viewing distance: smaller pixel pitches provide sharper images at close range, while larger pitches can be suitable for distant audiences. Also compare screen size, brightness, contrast, and viewing angles to ensure clear content in all expected conditions.
A reliable Led Wall Display Panel should feature sturdy construction, safe installation options, and convenient front or rear maintenance access. Check compatibility with media players, control systems, and common signal inputs before purchasing. Energy efficiency can reduce long-term operating expenses, while a clear warranty and responsive technical support offer valuable protection. Finally, evaluate the total cost, including installation, transportation, maintenance, accessories, and energy consumption, rather than focusing only on the initial purchase price.

Hafond Display